Two power management settings are vital for the laptop: the display and Sleep mode. Ideally, you want to use the display as little as possible on battery power, because the laptop’s screen consumes a huge amount of power — even more power for a tablet PC (touchscreen).
Automatic settings are available to turn off the screen and sleep the laptop after a given period of activity. These settings are made twice — once for when the laptop is plugged in and again for battery power. Obviously, each source demands different power savings.
To set the timeout length for the screen and Sleep mode, follow these steps:
Press the Win+I keyboard shortcut to conjure the Settings app.
Click the System button.
On the left side of the window, choose Power & Sleep.
On the right side of the window, choose a timeout value for the screen when the laptop is battery-powered.
For example, choose 5 minutes.
Choose a screen timeout value for the laptop when it’s AC-powered.
Set sleep timeout values for the laptop when it’s battery-powered or AC-powered.
Obviously, the laptop’s power manager can afford longer timeout durations when the device is plugged in as opposed to sucking juice from the battery.
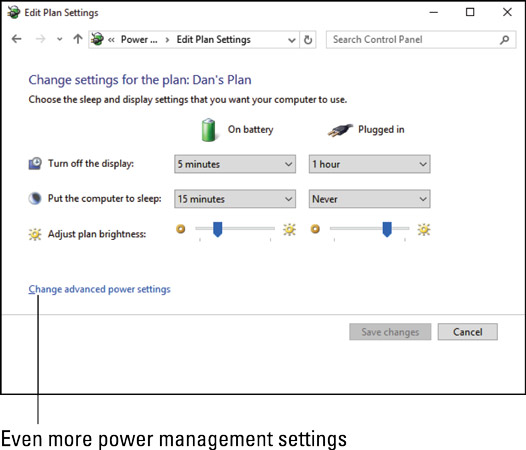
To make more specific changes to the power management plan, click the Additional Power Settings link, found at the bottom of the Power & Sleep screen. You see the Power Options screen. Click the Change Plan Settings link in that window to view the Edit Plan Settings window.

The options shown in the Edit Plan Settings window echo the changes made on the Power & Sleep screen. One additional item is the Adjust Plan Brightness setting. Also, the Change Advanced Power Settings link can further modify power management settings, including the low-battery warnings.
Click the Save Changes button on the Edit Plan Settings screen to lock in any modifications you’ve made.


