After you set up your Google classroom, you may want to customize it, especially if you’re going to have more than one classroom. This enables you to create a student experience that is more personalized to the class.
To add or change information about your class, log in to Google Classroom and access the class you want to modify. Then follow these steps:
Click the About tab.
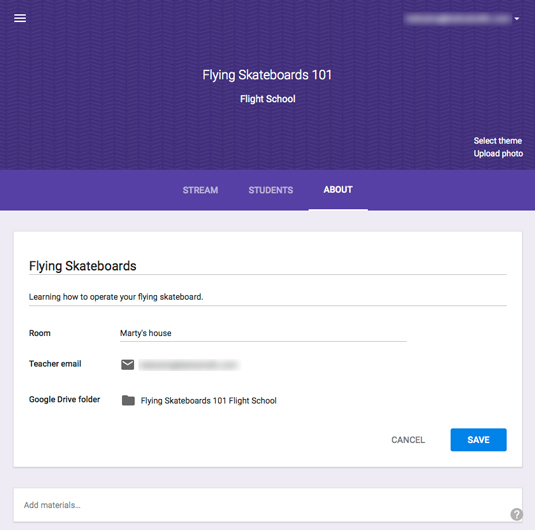
In the area that shows the information about your class, click the three stacked dots at the top right corner and choose Edit. You see the Edit screen in Figure 1.
In the Title field, type in the name of your course.
In the Description field, type in a description of your course.
In the Room field, type in where your class is held, such as the building and room number.
Click Save.
You can’t change the Teacher e-mail or Google Drive folder on this screen. If you click on the Google Drive folder, you’re taken to the Google Drive home for the class materials.

Source: google.com
If you want to add materials to the class, click the Add Materials box. You can give the item a title and add one of these kinds of materials:
An attachment uploaded from your hard drive (the paperclip)
A document from your Google Drive (the Google Drive icon)
A YouTube video (the video play button)
An external link (the chain link icon)
Click Post, and your item appears in the list and is stored on the Google Drive for your class.


