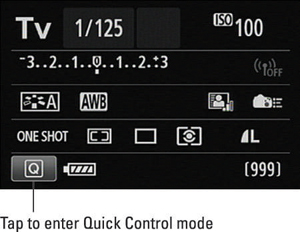
The Quick Control screen on your Canaon EOS 70D enables you to change certain shooting settings without using the function buttons (ISO button, Metering mode button, and so on) or menus. You can use this screen to adjust settings in any exposure mode, but the settings that are accessible depend on the mode you select.
To try it out, set the Mode dial to Tv (as shown in Figure 1) so that what you see on your screen looks like what you see in the upcoming figures. Then display the Shooting Settings screen (press the Info button as needed to get there) and either press the Q button or tap the Q icon in the lower-left corner of the screen.

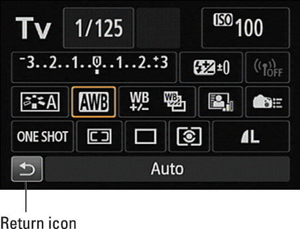
Either way, the screen shifts into Quick Control mode, and one of the options on the screen becomes highlighted. For example, the White Balance option is highlighted in the Figure 2. (AWB stands for Auto White Balance.)

Now take these steps to adjust a setting:
Select the setting you want to adjust.
Either tap the setting on the touchscreen or use the Multi-controller to highlight it.
When you first highlight some options, a little text box pops up to tell you what the setting is designed to do. Tap the x button in the upper right of the box to get rid of it. If you find these text boxes annoying, you can turn them off through the Feature Guide option on Setup Menu 3.
Select the option you want to use.
You can use these techniques:
To scroll through the available settings, rotate the Quick Control dial. The current setting appears at the bottom of the screen. For example, in Figure 2, the Auto setting is selected for the White Balance option.
To display all the possible settings on a single screen, tap the option or press the Set button. For example, if you’re adjusting the White Balance setting and tap the icon or press Set, you see the screen shown in Figure 3. Then tap the option you want to use or highlight it by rotating the Quick Control dial or using the Multi-controller. After selecting your choice, tap the return icon (the curved arrow in the lower-right corner of the screen) or press the Set button to return to the Quick Control screen.
 Figure 3: From the Quick Control screen, tap the selected item or press the Set button to display all available settings.
Exit Quick Control mode and return to shooting mode using any of these techniques.
Tap the Return symbol, labeled in Figure 2.
Press the Q button.
Press the shutter button halfway and release it.


