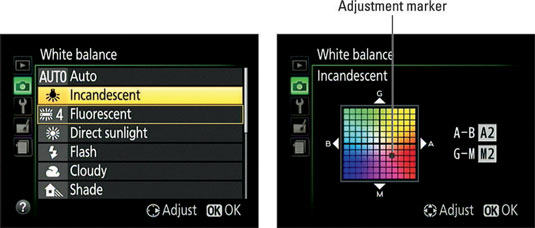
You can fine-tune any White Balance setting on the Nikon D3300 except a custom preset that you create by using the PRE option. Make the adjustment as follows.
Display the Shooting menu and highlight White Balance.
Press OK.
Highlight the White Balance setting you want to adjust, as shown on the left in the figure, and press the Multi Selector right.

You’re taken to a screen where you can do your fine-tuning. (See the right side of figure in Step 3.)
If you select Fluorescent, you first go to a screen where you select a specific type of bulb. After you highlight your choice, press the Multi Selector right to get to the fine-tuning screen.
Fine-tune the setting by using the Multi Selector to move the white balance shift marker in the color grid.

The grid is set up around two color pairs: Green and Magenta, represented by G and M; and Blue and Amber, represented by B and A. By pressing the Multi Selector, you can move the adjustment marker (refer to the little black box labeled) around the grid.
As you move the marker, the A–B and G–M boxes on the right side of the screen show you the current amount of color shift. A value of 0 indicates the default amount of color compensation applied by the selected White Balance setting. Here, for example, the marker was moved two levels toward amber and two levels toward magenta to specify that the colors should be a tad warmer.
Press OK to complete the adjustment.

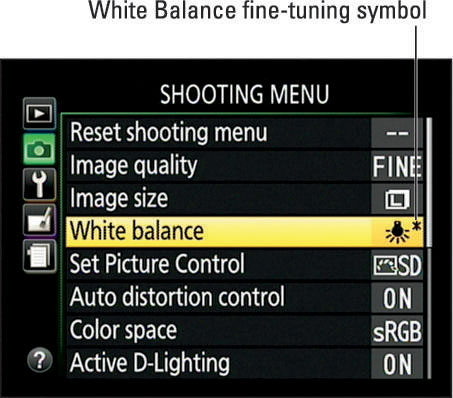
After you fine-tune a White Balance setting, an asterisk appears next to the icon representing the setting on the Shooting menu, as shown. You see an asterisk next to the White Balance setting in the Information and Live View displays as well.


