In Photoshop Elements 2019, the majority of your type entry will most likely be in point type mode. Point type is useful for short chunks of text, such as headlines, labels, logos, and headings for web pages. Point type doesn’t wrap automatically, but instead can run off your image into a type Neverland.
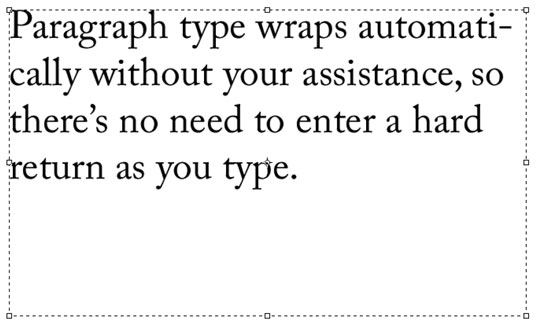
 Paragraph type automatically wraps to fit within your bounding box.
If you have larger chunks of text, it’s usually more practical to enter the text as paragraph type. Entering paragraph type is similar to entering text in a word-processing or page-layout program, except that the text is contained inside a bounding box. When you type and come to the end of the bounding box, Elements automatically wraps the text to the next line.
How to create point type
Point type is so called because it contains a single anchor point, which marks the starting point of the line of type. Remember that point-type lines don’t wrap automatically, as you can see here. Point type doesn’t wrap automatically, but instead can run off your image into a type Neverland.
Follow these steps to create point type:
- Open the Photo Editor and choose Expert mode.
- Open an image or create a new, blank Elements file by choosing File →New → Blank File and clicking OK.
- Select the Horizontal Type tool from the Tools panel. You can also press T to cycle through the various type tools. Additionally, you can also select the Horizontal Type tool from the Tool Options. It looks like a capital letter T.
- On the image, click where you want to insert your text. Your cursor is called an I-beam. When you click, you make an insertion point. A small, horizontal line about one-third of the way up the I-beam shows the baseline (the line on which the text sits) for horizontal type.
- Specify your type options from the Tool Options.
- Type your text and press Enter (Return on a Mac) to begin a new line. When you press Enter (or Return), you insert a hard return that doesn’t move.
- When you finish entering the text, click the Commit button (the green check-mark icon) near your text. If you want to bail out, click the Cancel button (the red No icon). You can also commit the type by pressing Enter on the numeric keypad or by clicking any other tool on the Tools panel. A new type layer with your text is created. Type layers appear on your Layers panel and are indicated by the T icon.
How to create paragraph type in Elements
To enter paragraph type, follow these steps:- Open the Photo Editor and choose Expert mode.
- Open an image or create a new, blank Elements file by choosing File → New → Blank File and clicking OK.
- Select the Horizontal Type tool from the Tools panel or press T to cycle through the various type tools. You can also select the Horizontal Type tool from the Tool Options.
- On the image, insert and size the bounding box by using one of two methods:
- Drag to create a bounding box close to your desired size. After you release the mouse button, you can drag any of the handles at the corners and sides of the box to resize it.
- Hold down the Alt (Option on the Mac) key and click the image. The Paragraph Text Size dialog box appears. Enter the exact dimensions of your desired bounding box. When you click OK, your specified box appears, complete with handles for resizing later.
- Specify your type options from the Tool Options.
- Enter your text; to start a new paragraph, press Enter (Return on a Mac). Each line wraps around to fit inside the bounding box, as shown in the following figure. If you type more text than can squeeze into the text box, an overflow icon (a box with a plus sign inside) appears. Resize the text box by dragging a bounding box handle.
- Click the Commit button (the green check-mark icon) next to the text box or press Enter on the numeric keypad. If you’re not happy with the text, you can click the Cancel button (the red No icon) and start over. After you click Commit, Elements creates a new type layer.
 Paragraph type automatically wraps to fit within your bounding box.


