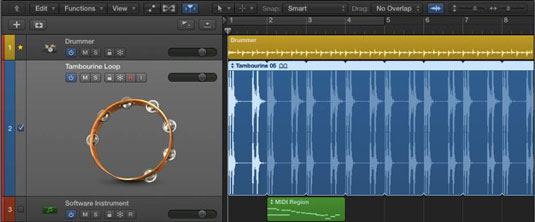
You’ll probably need to zoom in and out of tracks a lot, especially when you’re editing in Logic Pro X. Fortunately, you can zoom tracks in several ways. The first trick is to turn on Auto Track Zoom by pressing Control-Z or by choosing View→Auto Track Zoom from the tracks area toolbar. With Auto Track Zoom on, the currently selected track will automatically zoom horizontally.

You see not only more of the track contents but also a quick indicator of which track is selected and has focus. The key command makes it easy to toggle between the two zoom states.
At the top right of the tracks area toolbar are two zoom sliders, vertical to the left and horizontal to the right. Drag the sliders to adjust the zoom level. You can also use key commands to zoom; memorize them because they’re so easy to use.
To zoom in on all your tracks vertically, press Command-down arrow; to zoom out, press Command-up arrow. Likewise, to zoom in horizontally, press Command-right arrow; to zoom out, press Command-left arrow.
If you want to zoom in on a specific area of your tracks, you can use the zoom tool. It’s always available when your cursor is in the tracks area: Simply press Control-Option while dragging over the area you want to zoom.
Your cursor will temporarily turn into the zoom tool, and the area you select will automatically zoom when you release the cursor. To get back to the previous level of zoom, press Control-Option while clicking anywhere in the tracks area.
You can recall up to three levels of zoom by using the zoom tool. This means you can zoom in on a large portion of your project, zoom in on a smaller section, zoom in on a single part of a region, and then recall each one in sequence just by pressing Control-Option and clicking the tracks area.
Another useful key command to memorize is Z, which toggles the Zoom to Fit Selection or All Contents command. If a region is not selected, this zoom command zooms out to fit all the content in the tracks area. The tracks and regions are smaller and you can view all your content. If you have any regions selected, the same command will zoom in on those regions.
One more zoom to consider is the Waveform Vertical Zoom. Press Command-minus (–) or Command-plus (+) to zoom only your audio waveforms. This zoom feature makes your audio waveforms larger in the regions without making the regions themselves bigger.
You can use this feature for audio editing and voice-over work when waveforms aren’t tall because they’re not recorded at high volumes. If you forget the key command, use the waveform vertical zoom icon to the left of the zoom sliders in the tracks area toolbar.
The default state of zoom should be to see the entire project. You learned how to zoom out to see your entire project by pressing Z with no regions selected. From that position, you can easily see where you want to focus and get there quickly by Option-Command-dragging over the area. When you’re finished, zoom back out and decide what to do next. This method of zooming creates an efficient workflow.


